-
Shop
- Adidas
- Auto
- Back to School
- Best-Sellers
- Car Accessories
- Dating & Social Skills
- Education & Learning
- Family & Parenting
- Fashion
- Alexander McQueen
- Balenciaga
- Belts
- Bottega Veneta
- Brunello Cucinelli
- Burberry
- Chanel
- Chloé
- Dior
- Dolce & Gabbana
- Etro
- Fendi
- Gucci
- Hoodies & Sweatshirts
- Jacquemus
- Jil Sander
- Jimmy Choo
- Kiton
- Miu Miu
- Off-White
- Outerwear
- Prada
- Rick Owens
- Saint Laurent
- Sweaters & Cardigans
- The Row
- Tom Ford
- Tops & Shirts
- Umbrellas
- Valentino
- Valentino Garavani
- Versace
- Vivienne Westwood
- Fashion Accessories
- Gadgets
- Gifts
- Health & Beauty
- Health & Wellness
- Home & Garden
- Home Supplies
- Kids & Babies
- Kitchen
- Nike
- Outdoor Fun
- Personal Growth
- Pet Care
- Pet Supplies
- Pets
- Sport & Outdoors
- Summer 2025 Fashion Collection
- Summer Fashion
- Summer Food & Drinks
- Super Deals
- Travel
- Travel Gear
- Wealth
Easy Stainless Steel Grill Cleaning Brush Routine
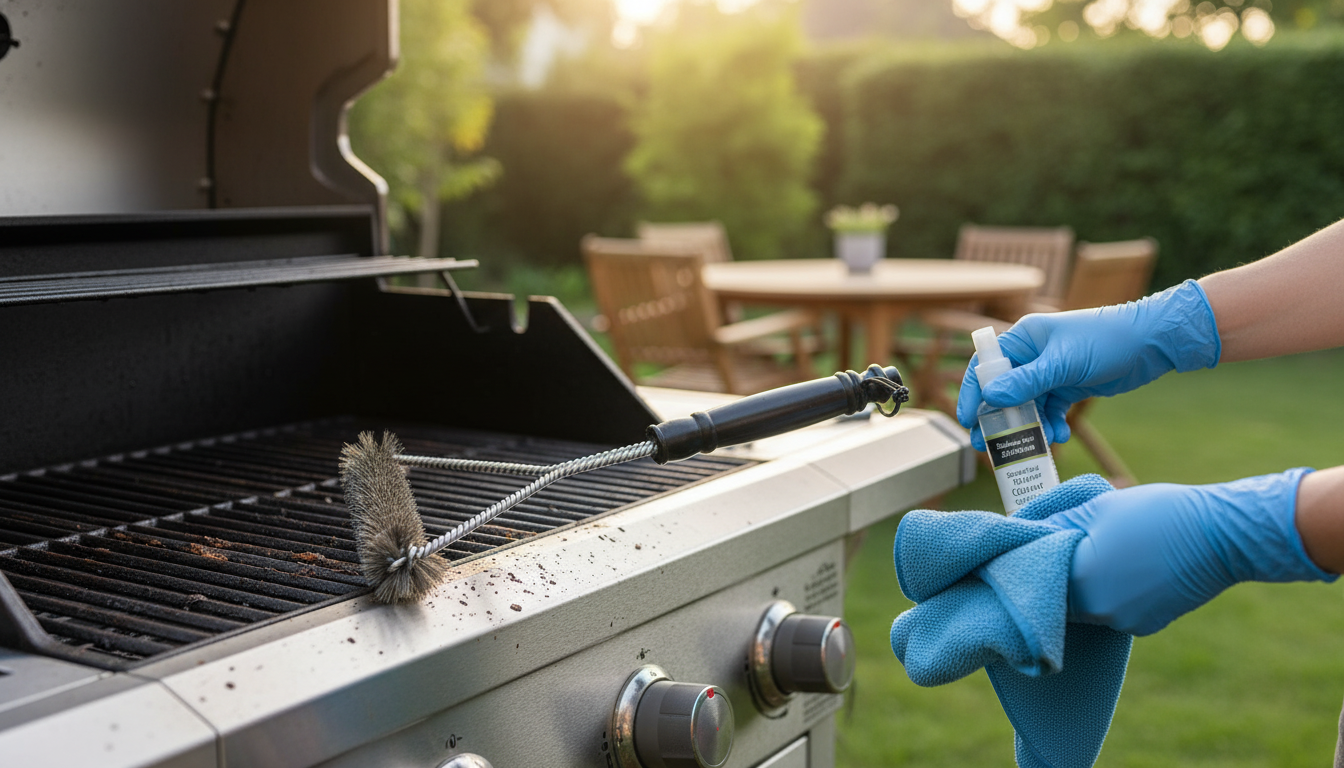
Stainless Steel Grill Cleaning, Made Simple
A dependable grill brush is one of those small tools that pays off every single cookout. When grates stay cleaner, food releases easier, hot spots are less dramatic, and yesterday’s sauce doesn’t show up as today’s burnt aftertaste. The Stainless Steel BBQ Grill Cleaning Brush – Heavy Duty Non-Stick Cleaner is built for quick, consistent scrubbing—lifting burnt-on residue without turning routine maintenance into a long, smoky chore.
Whether you grill a couple nights a week or only on weekends, the best results usually come from a short, repeatable routine: warm the grates, brush with steady passes, wipe away debris, and lightly re-oil when appropriate. That approach helps keep your grill performing like new while reducing the need for aggressive scraping later.
What a Heavy-Duty Grill Brush Helps Prevent
Grill grates take a beating: high heat, sugar-based marinades, dripping fat, and repeated cycles of expansion and cooling. A heavy-duty stainless steel brush helps you stay ahead of the mess before it turns into a stubborn layer.
- Carbon buildup that causes sticking and uneven browning
- Old grease and soot that can add bitter flavors to food
- Blocked grate gaps that reduce airflow and heat distribution
- Extra flare-ups caused by leftover fat and sauce residue
- More aggressive scraping later from skipping quick cleanups
Cleaner grates also support safer grilling habits, especially when combined with proper food handling. For reputable guidance on outdoor cooking safety, review the CDC’s tips on keeping food safe at the grill.
Design Highlights That Matter on Real Grills
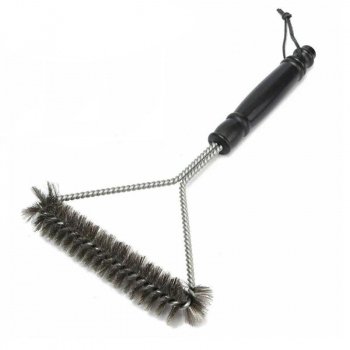
A grill brush should feel straightforward: strong enough to remove residue, controlled enough to avoid damage, and easy to keep close at hand. This stainless steel cleaner focuses on the basics that make routine upkeep more reliable.
- Stainless steel construction for dependable scrubbing strength
- Heavy-duty build intended for frequent use across many cookouts
- Non-stick focused cleaning approach: targets residue while aiming to be gentler on coated and seasoned surfaces when used correctly
- Compact, no-fuss tool that’s easy to store near the grill
- Works best as part of a simple routine: heat, brush, wipe, and re-oil if needed
How to Use It for Fast, Low-Effort Cleanup
Most of the “work” should be done by heat, not brute force. A few minutes of preheating softens residue so it lifts with fewer passes.
- Preheat the grill for a few minutes to soften residue (warm grates clean faster than cold ones).
- Brush along the direction of the grate bars using steady pressure rather than hard jabs.
- For stubborn spots, use short repeated passes and let heat do the work instead of digging in.
- Wipe grates with a folded paper towel or grill-safe cloth after brushing to remove loosened debris.
- For non-stick or coated grates, avoid excessive force; finish with a light oiling to help prevent sticking next cook.
For general grilling safety reminders—especially around open flames and flare-ups—NFPA’s guidance on grilling safety is a helpful reference.
Bristle Safety and Grill-Surface Care
Any grill brush should be treated like a wear item. A quick check and a quick wipe make a real difference in peace of mind and cooking cleanliness.
- Inspect the brush head before each session for bent, loose, or missing pieces.
- After brushing, wipe the grate to pick up any debris before adding food.
- Replace the brush if the head looks worn down or if strands appear loose.
- Use the right pressure: the goal is to lift residue, not grind the grate surface.
- For cast iron grates, keep them seasoned; for porcelain-coated grates, use a gentler touch to avoid chipping.
Clean grates also support safer cooking temperatures and handling. For practical food-safety basics, the USDA’s FSIS resource on barbecue and food safety is worth bookmarking.
Quick Comparison: Brush Styles and When Each Fits
Not every grill-cleaning tool feels the same. Some are faster for warm-grate maintenance; others are better for occasional deep cleaning. Choose based on your grate material, how often you grill, and whether you usually clean while the grates are warm.
| Tool type | Best for | Watch-outs |
|---|---|---|
| Stainless steel brush | Routine cleanup on warm grates; faster removal of stuck residue | Inspect for wear; wipe grates after brushing |
| Bristle-free coil/loop cleaner | Users who prefer bristle-free designs; steady scraping action | May require more passes on heavy carbon |
| Scraper (wood or metal) | Thick buildup; shaping to grate profile over time (wood) | Metal can be harsh on coated surfaces; avoid gouging |
| Grill stone/pumice | Deep cleaning sessions on durable grates | Can shed grit; not ideal for delicate coatings |
Cleaning the Brush and Storing It Between Cooks
A brush that’s caked with grease won’t clean efficiently, and it can create odors over time. A small amount of maintenance keeps the tool ready for the next cook.
When It’s Time to Replace a Grill Brush
A Simple Routine for Cleaner, More Non-Stick Grilling
Shop In-Stock Picks
- Stainless Steel BBQ Grill Cleaning Brush – Heavy Duty Non-Stick Cleaner
- Elegant Irregular Oval Shaped Tabletop Mirror for Home Décor
- Handmade Glazed Ceramic Flower Pot
FAQ
Is it safe to use a stainless steel grill brush on non-stick or porcelain-coated grates?
Generally yes when used with light-to-moderate pressure on warm grates; avoid aggressive digging that can chip coatings. Wipe grates after brushing and replace the brush if it shows signs of shedding or damage.
Should grill grates be cleaned while hot or cold?
Warm grates clean faster because residue softens. Let the grill cool slightly so it’s safe to work, then brush and wipe rather than handling surfaces that are dangerously hot.
How often should a grill brush be replaced?
Replace it when the head is worn, performance drops, or there are any loose or missing strands. If you grill frequently, inspect before each use and expect to replace the brush sooner.
Recommended for you
Was this article helpful?
Yes
No


Leave a comment